Monday, October 3, 2011

Fall Is Here - Fall Mantle Decor

Fall is my favorite time of the year. I love the baking, the apple picking, the cooler weather, the leaves changing colors and Halloween. But my favorite thing about fall is decorating for it! I don't put a ton of stuff out, but I like to add a few touches around the house that look more fallish.

In honor of my favorite season, I thought I'd do a series on fall decorating in October. Today I'll be sharing some autumn inspired fireplace mantles. I know not everyone has a fireplace, but it's always nice to look at pictures of them right? Here are a few of my favorites from pinterest:

Photobucket
I realize that this is a piano - and a very cool, old white one at that - but this same look could be used on a fireplace mantle. I love the banners!

Photobucket
So spooky and old school. Love the black and white and silver!

Photobucket
Hit up your local thrift store or salvage yard for some cool, old shutters and you've got yourself an amazing looking Halloween mantle! I love how they hung them off balance.

Photobucket
Further proof that Halloween decor doesn't have to be scary!! I love this simple, black and white decor.

Photobucket
Really digging this perfectly balanced mantle in black.

Photobucket
A very fun, casual take on fall

Photobucket
More formal, but I love it

Photobucket
Who says you have to save all your bling for Christmastime?? LOVE this one!!

I hope you found some inspiration in those fun mantle photos! Here are a couple of shots of my fireplace mantle dressed up for Halloween. I will probably add a few white mini pumpkins, but for now this is what it looks like!!

Photobucket

Photobucket

Happy Fall!!! Stay tuned for some outdoor photos tomorrow!!

Tuesday, September 27, 2011

House Tour - Family Room Before & After

I think I'm finally done enough with my family room to post a few pictures of it. The pictures are terrible because it has been so dark and rainy outside today AND also because my camera stinks AND also because I probably don't really know how to use it very well. Now that I've gotten all those disclaimers out of the way, here is the family room before. And after.

BEFORE:
There wasn't anything wrong with the family room before. There were just too many colors happening. And it wasn't really our style. Here are a few before shots taken at different times. You can see we had carpet at one point. And the fireplace wall was open too!!

Photobucket

Photobucket

Photobucket

Photobucket

Photobucket

AFTER:

Photobucket
Neutral wall color, new pillows/art/rug. Looking for one more sofa pillow in the perfect apple green color. You can never have too many throw pillows! I'm also thinking some sort of ottoman or coffee table might be nice in here? But it might be too much....

Photobucket
We have so much more room with the television over the fireplace. We still plan on adding decorative molding to the columns and building a shelf over the components for more storage.

Photobucket
A view from the kitchen area

Photobucket
A tall bookcase houses baskets for dvds and magazines

And that completes our tour of the family room! We love the way it turned out. It matches our personalities and suits our needs perfectly just the way a family room should! Thanks for stopping by to check it out!!

Want to know where we got everything?? Here's a break down....

Paint - Benjamin Moore's 'Shaker Beige'
Sofas - Sam's Club (we'll eventally replace these but for now we're good!)
End Table & Bookshelf - World Market
Throw Pillows - various etsy sellers
Wall frames and ledge - IKEA
Area Rug - Target
'LOVE' print - MadeByGirl on etsy
Home print - FREE printable you can find here http://eighteen25.blogspot.com/2011/05/filler-print.html

Tuesday, September 13, 2011

To Catch A Hamster

Cats supposedly have nine lives. How many, I ask you, do you think hamsters have? In our case, at least two. My kids' little hamster Lucy escaped from her cage in the night, ate mouse poison, got stuck to a sticky trap (DON'T even flipping ask) and lived to tell about it. Bad ass, right?

Just when we thought things were about the get boring (hahahahahahaha), she escaped again. We still have no idea how, but she did. We noticed she was gone Thursday night last week. We turned the entire house upside down looking for her furry little butt. No luck. I figured she was gone for good this time. But the kids put food out for her and in the morning it was gone. Sooooooo we knew she was still around.

After a couple of days of seeing absolutely NO trace of her, we decided to pick up a live mouse trap at our local home improvement store. It didn't work. She didn't go for it. Two days later, but still no hamster. Things weren't looking so good for Lucy.

And then just when we were about to give up, we came home this afternoon from running errands and who should we see hiding out behind the dryer but our long lost little hamster!! Thinking and acting quickly like Chris Hanson from "To Catch A Predator", Kevin grabbed a shoe box and sprung into action. WARNING: THESE NEXT FEW PHOTOS ARE VERY GRAPHIC AND MAY NOT BE SUITABLE FOR YOUNG CHILDREN

Photobucket

Photobucket

Photobucket

Photobucket

Photobucket

Success!!!! We are happy to report that Lucy was apprehended quickly and that no hamsters OR husbands were harmed in the process. We have a new and improved, escape free cage where Lucy is now resting comfortably with her sister Fat Phoebe. Reunited and it feels so good!!

Thursday, September 8, 2011

Abby's Room

I have been waiting to post photos of the kids' rooms because they're not really done yet. They still need quarter round for crying out loud! I'm constantly changing and adding to rooms anyways, so I figured why not post a few!! I have plans for these rooms as far as how to make them more efficient - think storage. But anywho, here is Abby's room. Her room actually used to be Ethan's room. We switched them around last summer because it made more sense this way.

Photobucket
Bad picture quality! When you enter her room, this is what you see... usually with more toys on the floor, but I just cleaned! :) I'm planning on adding a band of material to the bottom of the curtain panels that coordinates with her bedding. And we still need to hang some more things on the wall.

Photobucket

Photobucket
Her bedding is from Target and the headboard is actually from Walmart online. We got such a great deal on everything!! The entire room was themed around the stuffed monkey you see on her bed. The very talented Sarah Mock aka Odd Dotty made Molly Monkey for her birthday and she adores it. I am thinking of ditching the little bookshelf in between the windows and doing white, floor to ceiling built ins on either side of her bed. Maybe like this?
Photobucket
You know how much I heart construction. :)

Photobucket
Her dresser which is about to be painted white. She has her own bulletin board for photos and drawings. Notice the disco ball. ;) Dance parties happen in here quite often!!

Photobucket
The incredible wall of closets. Sooooooooooo not sure what needs to happen to make this better looking. I've thought long and hard about opening them up OR taking the doors off and putting curtains up instead. I thought about painting them a differnt color?? I don't know what to do. Abby's clothes, etc are in the closet on the right. Kevin's entire drum set is in the closet on the left. Dilema.

So that's my little tour of Abby's room!! Have you made any changes to your kids' rooms lately? How do you cope with storage/closet issues without making the room look too cluttered? I'm open for any and all suggestions! I need all the help I can get!!

Monday, September 5, 2011

Garage Sneak Peek

Just a quick peek at what we've been working on.....

Photobucket

We still have to mount the shelves to the wall and we're going to epoxy the floor in black and grey, but it's finally starting to come together. I have to hit that door with another coat of black paint too. But it's looking so great! We have a nice little shoe bench and a place to hang bike helmets next to the door. The shelves that are to the right will be used for extra things like toilet paper, water, etc. I even have a place for my Aldi bags now!! All this stuff used to be shoved into overflowing closets. It will be so nice to free up that space!! Stay tuned for even more pictures once everything is really for really real done!!!

DIY Carriage Garage Door

Ever wonder what to do to make your plain builder garage door look like one of those expensive carriage house doors? Me too. But wonder no more! Thanks to some $25 ebay hardware, a small can of black rustoleum paint and some painters tape, I now have a very cool door!

I found this idea on pinterest (of course!) and the hardware I got here: http://www.ebay.com/itm/Decorative-Garage-Door-Carriage-House-Hardware-/290560599077?pt=Garage_Doors_Openers&hash=item43a6c2e425
This wasn't a difficult or time consuming project at all, BUT you have to make sure you're careful when taping. I *thought* I had purchased the green "frog" tape at Menard's but it actually turned out to be the blue tape wrapped in a green label. How confusing right? So instead of going back to the store to exchange it, I went for it and used the blue tape. The black paint bled pretty bad, so now I have to go back over the edges with a smaller brush and some white paint. The line down the middle of the garage to make it look like two separate doors bled the worst. Ugh!!!

Here is a photo of the "during" process. There's only one coat of black gloss paint on the faux windows at this point. I did three coats.

Photobucket

Here is the street view of the door all finished. If you get up close, you can obviously tell the windows are painted on. But I don't care!! I think it looks so much better than it did when it was just a plain, white door!!

Photobucket

We have been busy cleaning and organizing the garage these past couple of weeks. The walls are all drywalled and painted. The doors on the inside are painted and we're getting ready to epoxy the floor in the next couple of weeks. Our garage has been this dark, junky place since we've lived here. Everything we didn't want inside the house just got chucked out there. We're trying to make it more of an extension of our home, so I thought the doors needed a facelift too! Stay tuned for photos of the finished garage renovation!!

Monday, August 8, 2011

DIY Floating Shelves

It all started when I couldn't find floating shelves in the right size. Not at Ikea, not at target, not at West Elm, not anywhere. I had been searching for some for over the toilet in the downstairs bathroom, but they needed to be just under thirty inches wide. I wanted them to fit exactly in between the two walls so that I could put extra toilet paper and other cool/useful stuff on them. Sort of like these:

Photobucket

Photobucket

Photobucket

We all know that Kevin and I are no strangers to a good DIY project, especially one involving lots of liquid nails and plywood. And it just so happened that we had some plywood leftover in the garage from another build. Hooray for free floating shelves!!!

http://www.younghouselove.com/2010/04/build-it-with-ana-floating-shelves/

We used the tutorial from Young House Love and Ana (from Knock Off Wood) to figure out how to build ours. Check out the above link if you want to make your own! We used strips of wood to make a frame on the back and sides of the walls and spaced them about fourteen inches apart. Then we attached plywood to the top and bottom of the wood frame.

Photobucket

After that, we nailed a strip of wood to the front of the plywood. I am still in the process of sanding, priming and painting them. Ours will be white, but you could definately stain them as well. Here's what they look like before paint...

Photobucket

Stay tuned for the after pics when it's all painted and decorated!

Tuesday, July 19, 2011

Sew Happy - A Kitchen Window Treatment Love Story

If you had told me years ago or even months ago that I would attempt to sew my own kitchen window treatment, I'd have thought you were crazy. Sewing has always freaked me out. The thought of buying fabric and trying to make something and having it end up looking like total ass, the work and the frustration of wasted time. I don't know. I just never thought I'd be the sewing kind of person. And I was okay with that.

Well, that all changed when my parents bought Abby a little sewing machine for Christmas last year. It's not a little kid sewing machine, just a more compact version of a regular, adult one. It's so easy to use! Abby just dove right into using it. She was never afraid to try and fail, so I thought I'd take a cue from her and give it a shot. She's been my little sewing mentor!! We started out with small projects like hemming curtains and things like that. Then we made some pillow covers with an envelope back. It wasn't so hard!

Photobucket
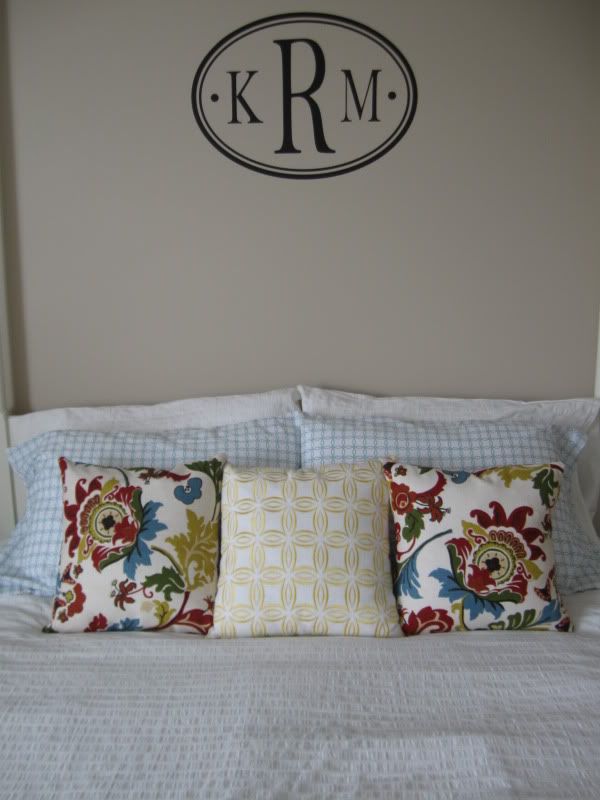
bedroom pillow covers...

Months into this home renovation, the kitchen window has remained treatment-less. It has a plantation blind for privacy, but needed something colorful and exciting to dress it up a bit. There are some problems with the window though. For one thing, it's HUGE. Like stupid huge. 72" wide to be exact. I would rather have it be half the size and put another set of kitchen cabinets or wall shelving on the other side, but Kevin says there will be no replacing of windows or siding right now. Poop. The other problem is that the sink isn't centered underneath. I had thought about doing two short panels on either side, but because of that it would just look lame. Needless to say, it was kind of a dilema and nothing I could find in stores really worked for the window. Nothing was the right size or shape or even the right color. I looked online at lots of stores too, but short of spending hundreds of dollars there just wasn't a lot to choose from.That's when I started thinking about sewing something myself. Which is crazy. But, crazy just happens to be my middle name.

So I began looking at all sorts of photos on pinterest and searching google for DIY window shades. I found some pretty good faux roman shade tutorials, but wasn't sure all of those folds would look great on that large and in charge window. Then I found the perfect solution on this amazing blog called The It Girl Project.

Photobucket

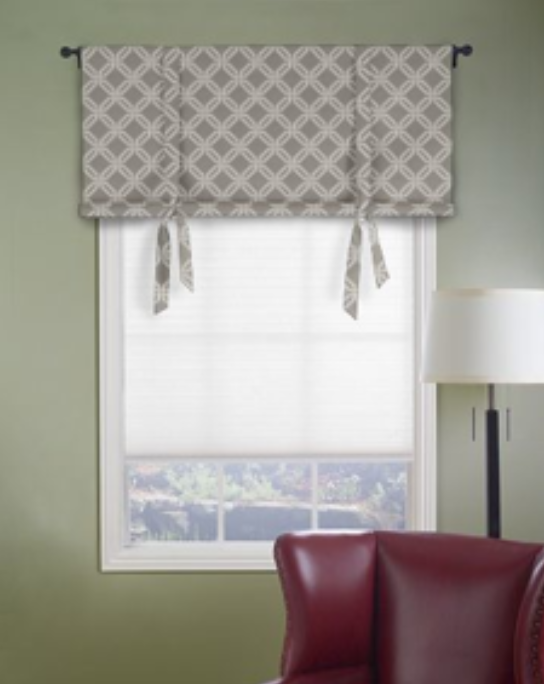
It was simple looking like a valance, but just a little fancier with the tie ups. AND there was a tutorial on how to make the shade which was even more perfect. Here it is for those who are interested: http://theitgirlproject.com/2011/02/22/diy-window-shades/
And it just so happened that I liked the fabric in the inspiration photo and that it came in my favorite color - apple green!! Alas, the stars aligned and all was right with the universe. It looked like I would have my perfect window treatment after all!!

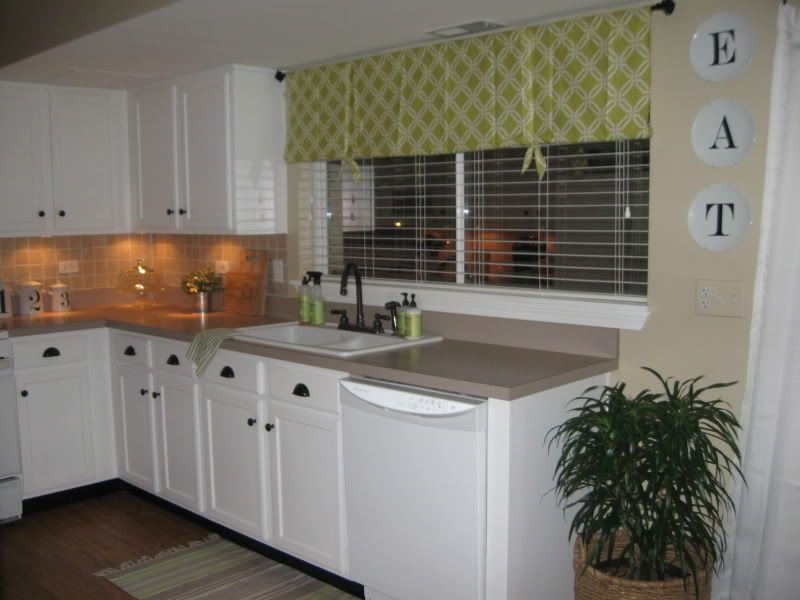
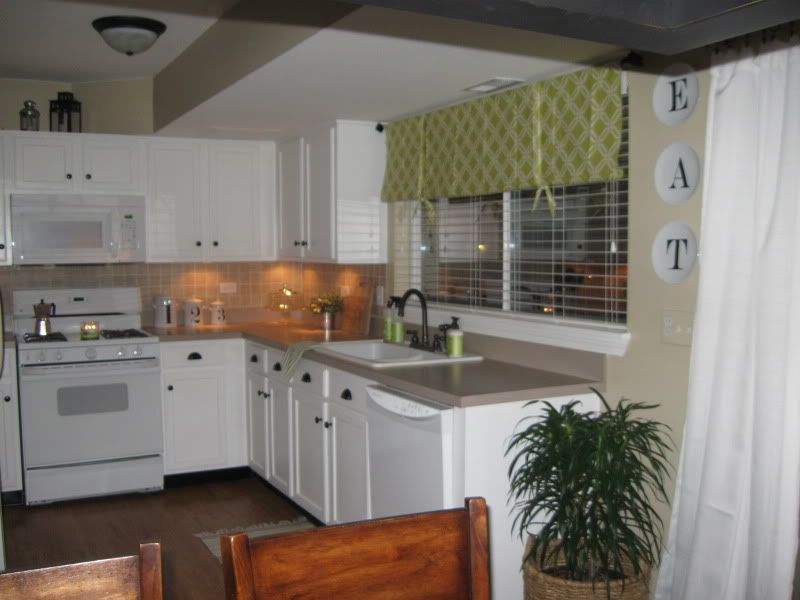
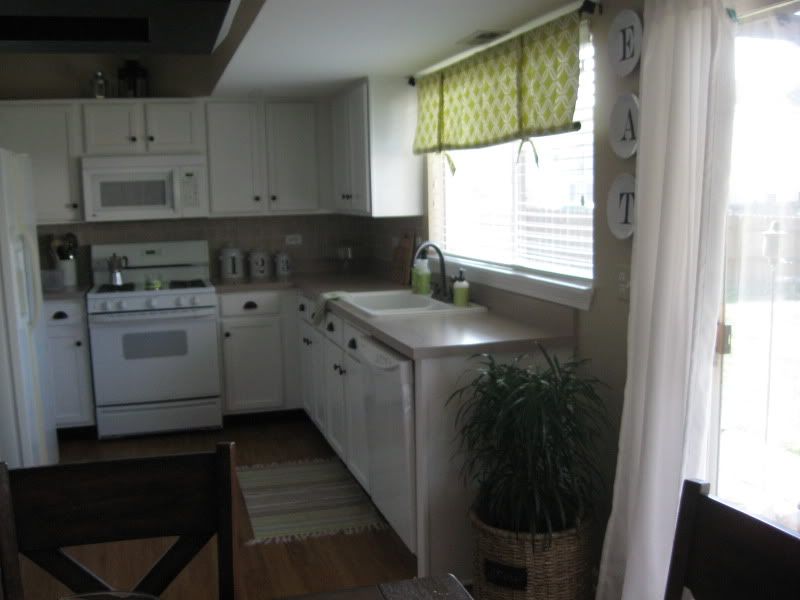
The fabric arrived last week, so Abby and I got to work making the shade yesterday afternoon. The It Girls used Stitch Witchery for their shade, but we decided to sew ours. Other than that, it's made the same. After a lot of measuring, cutting, ironing, pinning, sewing and cursing (just kidding. Well, not really), we had our window shade!!! Here are some photos of it at night and one during the day. See how I need a new camera really bad?!?!!?

Photobucket

Photobucket

Photobucket

Photobucket

Photobucket

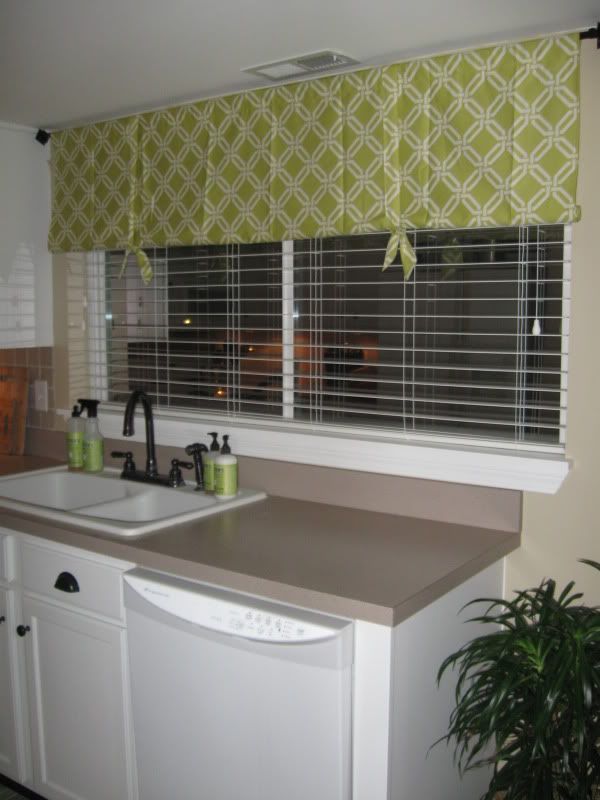
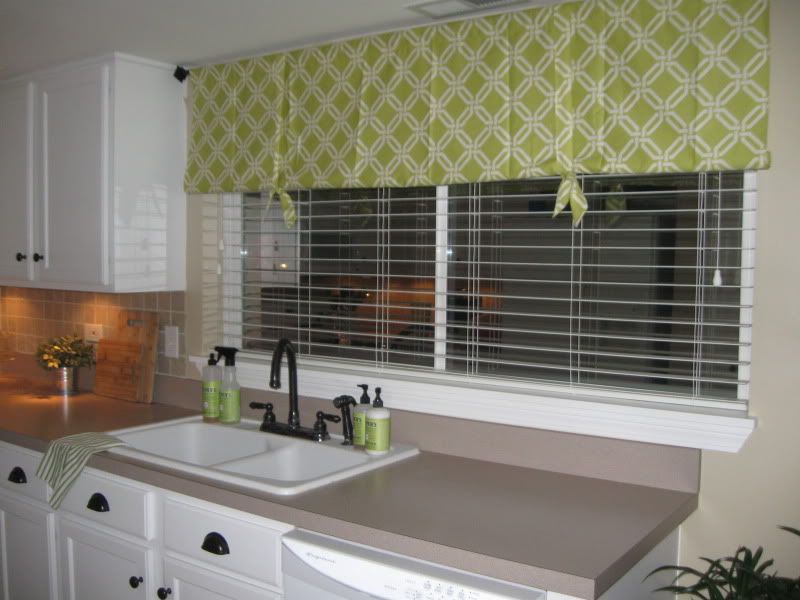
The It Girls used ribbon to tie up their shade, but we opted to make ours out of the leftover fabric from the shade. I wasn't sure it would turn out, but it did! Woo hoo! There are two wooden dowel rods in the bottom of the shade for support. If you wanted your shade to hang loosely (think shabby chic), you could skip the rod. There are lots of options!!

I LOVE how this window turned out! I guess the moral of the story is not to be afraid to try something new. I'm a long way from a pro and if you look closely at the shade you would definately notice that. But it's more than I ever thought I could do!! I'd love to hear some of your sewing success stories! Any window treatment dilemas you've solved with a sewing machine??

Thursday, July 14, 2011

House Tour - The Office

As much as things are SUPER unfinished around here, I thought I would take the time on Fridays to do a tour of a different room in our house. I've learned things will never really be finished with me because I am constantly tweaking and rearranging!! Plus, it's fun to see how far we've come!!

The first tour is going to be of our home office. Kevin doesn't work from home very often, but when he does it's nice to have a nice big desk area with two different workstations for both of us. All of the furniture in this space is from Ikea except for the little, round side table. Before we see current photos, let take a trip down memory lane to see what this space looked like before it became "the office."

First, it was an empty, lack luster, beige carpet filled formal dining room....

Photobucket

Then we painted it merlot, but we still NEVER used it as a formal dining room.....

Photobucket

Photobucket

Then we turned it into a awesome homeschooling space for our kids, but it was so dark and sort of a catch all for junk....

Photobucket

Photobucket

Photobucket

Then we closed it in, added french doors and painted it a bright, fun chartreuse/apple green - Sweet Daphne by Benjamin Moore. These are the progress photos... what a mess! But what a transformation!!

Photobucket

Photobucket

Photobucket

Photobucket

Photobucket

Photobucket

Photobucket

Now, it's our home office!!! Here it is today.

Photobucket

Photobucket

Photobucket

Photobucket

Photobucket

Photobucket


We seriously use the heck out of this room. All of the kids' school books are in our generously sized Expedit wall shelving. We have plenty of space for everything!! I am still going to be adding more decorative pieces to the Expedit and changing some of the white boxes over to baskets at some point. We still need art for the top of it as well. I would also like to get a desk lamp and some cute plants for the Lack shelf over the desk. And of course once winter hits again, we'll want some sort of warm graphic rug to keep our feet warm while blogging!!

That it for this Friday's house tour!! Hope you enjoyed it!! Stay tuned for next week when we tour the kitchen!!

About Blogging Molly

My photo
I am a mom to three great kids - Ethan is 12, Abby is 9 and Lulu (Olivia) is 5. I've been married to my highschool sweetheart for almost fourteen years. I love to paint, renovate and live for anything DIY. I love music and I love to bake. I also teach dance at a local studio. Thanks for stopping by my blog!!!

What I'm listening to.....


Get a playlist! Standalone player Get Ringtones

My People