Well, that all changed when my parents bought Abby a little sewing machine for Christmas last year. It's not a little kid sewing machine, just a more compact version of a regular, adult one. It's so easy to use! Abby just dove right into using it. She was never afraid to try and fail, so I thought I'd take a cue from her and give it a shot. She's been my little sewing mentor!! We started out with small projects like hemming curtains and things like that. Then we made some pillow covers with an envelope back. It wasn't so hard!

bedroom pillow covers...
Months into this home renovation, the kitchen window has remained treatment-less. It has a plantation blind for privacy, but needed something colorful and exciting to dress it up a bit. There are some problems with the window though. For one thing, it's HUGE. Like stupid huge. 72" wide to be exact. I would rather have it be half the size and put another set of kitchen cabinets or wall shelving on the other side, but Kevin says there will be no replacing of windows or siding right now. Poop. The other problem is that the sink isn't centered underneath. I had thought about doing two short panels on either side, but because of that it would just look lame. Needless to say, it was kind of a dilema and nothing I could find in stores really worked for the window. Nothing was the right size or shape or even the right color. I looked online at lots of stores too, but short of spending hundreds of dollars there just wasn't a lot to choose from.That's when I started thinking about sewing something myself. Which is crazy. But, crazy just happens to be my middle name.
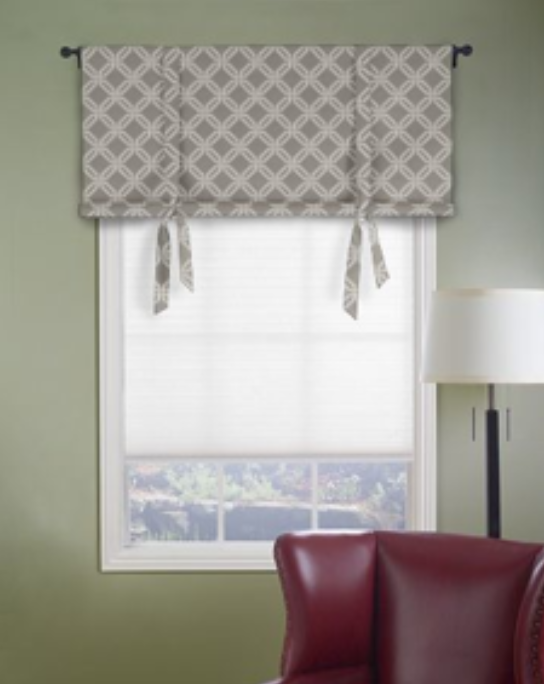
So I began looking at all sorts of photos on pinterest and searching google for DIY window shades. I found some pretty good faux roman shade tutorials, but wasn't sure all of those folds would look great on that large and in charge window. Then I found the perfect solution on this amazing blog called The It Girl Project.

It was simple looking like a valance, but just a little fancier with the tie ups. AND there was a tutorial on how to make the shade which was even more perfect. Here it is for those who are interested: http://theitgirlproject.com/2011/02/22/diy-window-shades/
And it just so happened that I liked the fabric in the inspiration photo and that it came in my favorite color - apple green!! Alas, the stars aligned and all was right with the universe. It looked like I would have my perfect window treatment after all!!
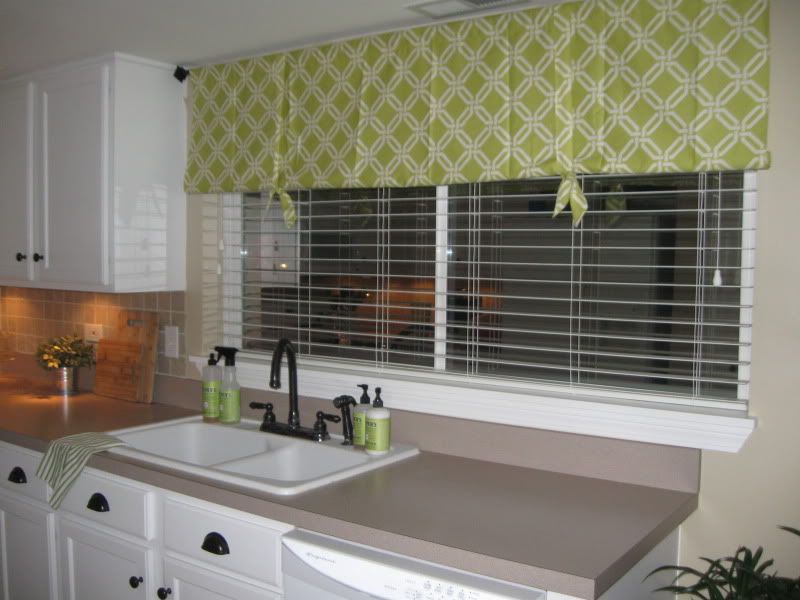
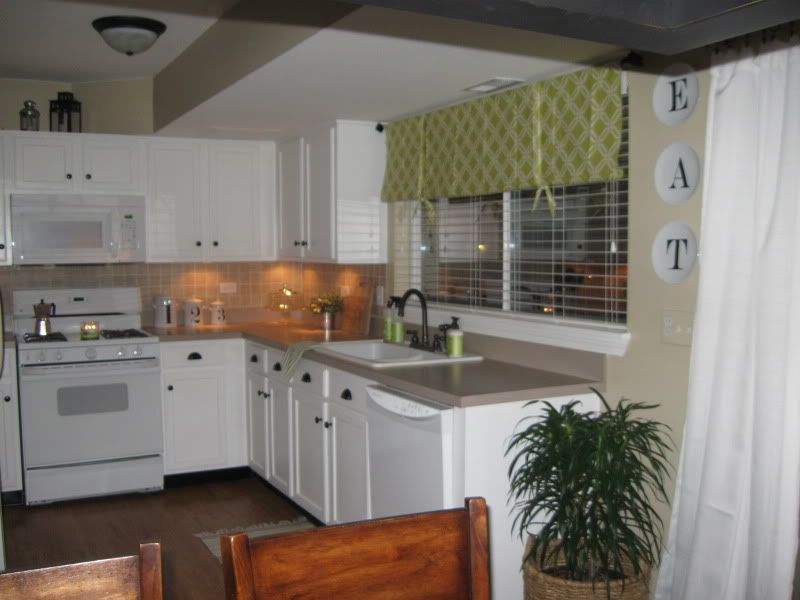
The fabric arrived last week, so Abby and I got to work making the shade yesterday afternoon. The It Girls used Stitch Witchery for their shade, but we decided to sew ours. Other than that, it's made the same. After a lot of measuring, cutting, ironing, pinning, sewing and cursing (just kidding. Well, not really), we had our window shade!!! Here are some photos of it at night and one during the day. See how I need a new camera really bad?!?!!?


The It Girls used ribbon to tie up their shade, but we opted to make ours out of the leftover fabric from the shade. I wasn't sure it would turn out, but it did! Woo hoo! There are two wooden dowel rods in the bottom of the shade for support. If you wanted your shade to hang loosely (think shabby chic), you could skip the rod. There are lots of options!!
I LOVE how this window turned out! I guess the moral of the story is not to be afraid to try something new. I'm a long way from a pro and if you look closely at the shade you would definately notice that. But it's more than I ever thought I could do!! I'd love to hear some of your sewing success stories! Any window treatment dilemas you've solved with a sewing machine??


4 comments:
WooHoo!! Go Molly!! Welcome to the fabulous world of sewing! Your windows looks fantastic. Nicely done!
It looks great! Love the pop of color!
Hi there! I love your shades!! For some reason the link to the pattern doesn't work - any chance you have a working link? Thanks!
I keep getting sent to a search engine for the address you provided on these shades tutorial. Can you help with a little better link?
Post a Comment